Skip to Content Skip to Footer
Wyoming WIC
Wyoming WIC
  • Home
  • Women
    • Women
      Breastfeeding
    • Women
      Healthy Tips for Moms
    • Women
      Postpartum
    • Women
      Pregnant
  • Infants
    • Infants
      Feeding & Nutrition
    • Infants
      Growth & Development
  • Children
    • Children
      Toddlers
    • Children
      2-5 Year Olds
  • Families
    • Families
      Activity and Play
    • Families
      Dads
    • Families
      Food & Family Meals
    • Families
      Immunizations
    • Families
      Safety
  • Live Well Blog
  • Food Shopping Guide
  • Español
Mom and toddler eating veggie smiling

Jarred Baby Foods – for the whole family

  • Home
  • Live Well Blog
  • Jarred Baby Foods – for the whole family
Jarred Baby Foods QR Code
October 9, 2024 Recipes

Do you have extra jars of baby food that you’re not sure what to do with? Try using them in recipes for the whole family! Jarred baby foods can be an easy way to add flavor and nutrients to many of your favorite dishes.

Read on for creative ways to use up extra jars of baby food.

pitch union
Fruits

Jarred Fruits & Vegetables

Can be poured into ice cube trays and frozen as popsicles.
Jarred Fruits and Vegetables

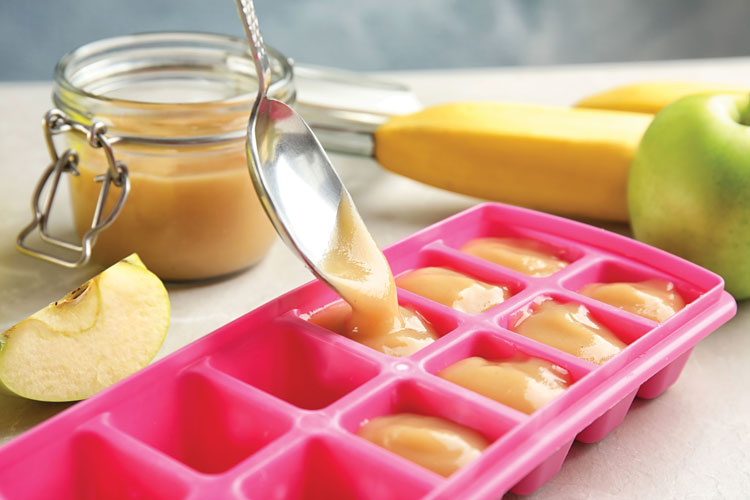
Replace some of the fat or liquid in recipes for muffins, pancakes, or bread with jarred baby food purees.

Add more flavor and thicken sauces and soups by adding in jarred vegetables like sweet potato or butternut squash.

Blend jarred vegetable purees with Greek yogurt, lemon juice, and herbs to create a flavorful salad dressing or dip.

Add jarred fruits to infant cereal or regular oatmeal for added flavor and nutrition.

Use jarred fruits instead of jelly or jam on toast.

Cereals

Jarred Cereals

Mix with mashed bananas, eggs, and a bit of milk to create a pancake batter.

Add into soups or stews to thicken and for extra nutrients.

Dip chicken or fish into beaten eggs, then coat in jarred baby cereal to use as a breading before baking or frying.

Layer with yogurt and fresh fruits to create a breakfast or dessert parfait.

Jarred Cereals
Meats

Jarred Meats

Add into recipes for meatballs, meatloaf, or pasta sauces for a boost of protein and flavor.

Jarred Baby Food Recipes

Teething Biscuits

Great for 6 to 8-month-olds!
  • 1 cup flour (for biscuit mix)
  • ¼ cup flour (for counter surface)
  • 1 cup baby cereal (rice or oatmeal)
  • 1 jar vegetable or fruit baby food
  • ½ cup ice water
  • 3 tablespoons melted butter or cooking oil

Instructions

  • Preheat oven to 425° F degrees.
  • Mix together 1 cup flour, baby cereal, and jarred baby food.
  • Slowly stir in the oil or butter.
  • Mix in ¼ cup ice water until dough begins to form into a ball. Add a little more ice water if dough is too dry.
  • Sprinkle ¼ cup flour onto the counter or firm surface.
  • Scoop 1-inch portions of dough onto the floured surface, flatten to the thickness of a cracker, then place on an ungreased cookie sheet.
  • Bake for 10 to 12 minutes, or until golden brown. Cool all the way before offering or eating.
pitch union

Cereal Pancakes

Makes about twelve, 4-inch pancakes.
  • 1 cup flour
  • ½ cup baby cereal (rice or oatmeal)
  • 1 jar of baby food bananas (or any other fruit)
  • 1 Tablespoon melted margarine or butter
  • 3 egg yolks (the yellow part of the egg)
  • ¼ teaspoon cinnamon (optional)
  • 1 teaspoon vanilla extract (optional)
  • 1 cup water or apple juice

Instructions

  • In a bowl, mix together all ingredients except the water/juice.
  • Slowly add the water/juice to make a batter.
  • Lightly oil a skillet or frying pan, then heat over medium on the stove.
  • When skillet is hot, carefully pour about ¼ cup of the batter into the skillet.
  • Once the pancake starts to cook and form little bubbles, flip the pancake over with a spatula to cook the other side, about 2-3 minutes.
  • Allow pancake to cool before offering or eating. If your skillet is big enough, you can make more than one pancake at a time.
Pink Union

Apple Rice Pudding

Extra easy!
  • 1 cup prepared infant rice cereal
  • 1 cup yogurt
  • 2 jars baby food apples (or any other fruit)
  • 1 teaspoon cinnamon

Instructions

  • In a large bowl, combine the rice cereal and jarred apples.
  • Stir in the cinnamon and yogurt, mixing well.
  • Spoon the pudding into dishes and serve.
Black scalloped border against light background.

Baby Food Meatballs

Remember to always wash your hands and kitchen surfaces before and after working with raw meat.
  • 1 ¼ pound lean ground beef, turkey, or chicken
  • ½ cup baby cereal (rice or oatmeal)
  • 1 cup of shredded white cheddar or mozzarella cheese
  • 1 jar of baby food vegetables
  • 1 egg beaten
  • Pinch of spice such as pepper, garlic powder, and oregano

Instructions

  • Preheat the oven to 400° F.
  • In a bowl, mix together baby cereal and jarred vegetables until smooth.
  • Add remaining ingredients to bowl and mix until well combined.
  • Scoop out small portions of the meatball mixture to form balls the size of small eggs or ping-pong balls.
  • Place the meatballs on a baking sheet and bake 20-25 minutes, until brown and cooked through (to 165° F if using chicken or turkey, or 145° F if using beef).
pitch union

Sweet Potato Puffs

Perfect for fall!
  • ½ cup rice cereal, single grain
  • 2 large egg yolks
  • 1 jar of baby food sweet potato
  • 1 jar of baby food apples
  • 1 tablespoon butter, unsalted
  • 1 teaspoon baking powder
  • ¼ teaspoon ground cinnamon

Instructions

  • Preheat oven to 350° F and line baking sheet with parchment paper.
  • Combine all ingredients in a blender or food processor until smooth.
  • Pour batter into a plastic zip-top bag.
  • Cut a tiny tip off of one bottom corner of the bag, then squeeze small dots of the batter from the corner hole onto the lined cookie sheet
  • Bake at 350° F for 10 minutes, then lower the heat to 250° F and bake 20 minutes more.
  • Remove from oven and allow to cool. Pick up the parchment paper to loosen the puffs and pour into a glass storage container. Repeat steps 6-8 until you’ve used up all the batter.
  • Be sure the puffs are completely cooled before offering, eating, or storing in a zip seal bag or covered container.
Pink Union

Recipes adapted from Arizona WIC:
https://www.azdhs.gov/documents/prevention/azwic/agencies/nutrition-education/using-baby-food-in-recipes.pdf

and Minnesota WIC:
https://www.health.state.mn.us/people/wic/recipes/infantfoods.html

REFERENCES:

https://www.maricopa.gov/DocumentCenter/View/94037/Maricopa-WIC-Cookbook—English?bidId=

https://www.health.state.mn.us/people/wic/recipes/infantfoods.html

  • Infant
    • Infant Pacifiers:
      Benefits, Safety Tips, and When to Wean
    • The Basics of Paced Bottle-Feeding
    • How Do I Know If My Baby Could Be Tongue-Tied?
    • Protect Your Baby from Cronobacter
    • Exploring the World with Baby – Sensory Play
  • Children
    • Shopping With Kids: A Simple Way to Help Them Like More Foods
    • Pumpkin Fun: Free and Healthy Activities for Kids Under 5
    • Letting Your Child Play with Food Can Be a Good Thing
    • Is Snack Time Treat Time?
    • Fun Ways to Learn About Healthy Food and Get Moving!
  • General /Family
    • Meet the Milks: Dairy and Plant-Based Choices
    • Avoiding Food Waste
    • The 2025-2030 Dietary Guidelines for Americans – What Families Need to Know
    • Finding Calm When Life Gets Busy: Stress-Management for Parents
    • February Is National Heart Month: Simple Ways to Show Your Heart Some Love
  • Women
    • Paced Bottle-Feeding: How to Feed Your Baby the Right Way
    • Breastfeeding and Returning to Work: Tips for Pumping & Planning
    • Increasing Milk Supply: Myths vs. Facts About Breastfeeding
    • Pumping Basics & Safe Breast Milk Storage Guide
    • Getting a Good Latch: Breastfeeding Positions & Holds That Help
  • Recipes
    • Simple Meals with Canned Fish: Easy, Healthy & Budget-Friendly Ideas
    • Fresh & Easy Spring Snacks for Toddlers
    • Fresh & Easy Spring Veggie Pasta
    • Heart-Healthy Recipe: Banana Berry Oatmeal Cups
    • Is the Chia Seed Challenge Worth It?
Wyoming WIC WDH Public Health

CONTACT US

1-888-996-9378
health.wyo.gov/wic
  • How to apply for WIC

Resources

  • WIC Shopper
  • WIC Smart
  • WIC Breastfeeding Support
  • Wyoming Medicaid
  • Wyoming 211
  • Tell a friend about WIC!
  • Guide to Using Your WIC Benefits
  • Wyoming WIC Facebook
  • Wyoming WIC Instagram
  • Wyoming WIC

USDA is an equal opportunity provider, employer, and lender.

Cookie PolicyPrivacy Policy

© Brush Art Corporation
This website is operated by Brush Art Corporation on behalf of the Wyoming Department of Health.

Install this web app on your iPhone: tap and then Add to Home Screen.

SIDE-LYING HOLD

Side-Lying Hold

  1. For the right breast, lie on your right side with your baby facing you.
  2. Pull your baby close. Your baby’s mouth should be level with your nipple.
  3. In this position, you can cradle your baby’s back with your left arm and support yourself with your right arm and/or pillows.
  4. Keep loose clothing and bedding away from your baby.
  5. Reverse for the left breast.

This hold is useful when:

  • You had a C-section
  • You want to rest while baby feeds
  • You are breastfeeding in the middle of the night
  • You and your baby are comfortable in this position
CROSS-CRADLE HOLD

Cross-Cradle Hold

  1. For the right breast, use your left arm to hold your baby’s head at your right breast and baby’s body toward your left side. A pillow across your lap can help support your left arm.
  2. Gently place your left hand behind your baby’s ears and neck, with your thumb and index finger behind each ear and your palm between baby’s shoulder blades. Turn your baby’s body toward yours so your tummies are touching.
  3. Hold your breast as if you are squeezing a sandwich. To protect your back, avoid leaning down to your baby. Instead, bring your baby to you.
  4. As your baby’s mouth opens, push gently with your left palm on baby’s head to help them latch on. Make sure you keep your fingers out of the way.
  5. Reverse for the left breast.

This hold is useful when:

  • Your baby is premature
  • Your baby has a weak suck
  • Your baby needs help to stay latched
  • Your baby needs extra head support
  • You and your baby are comfortable in this position
CLUTCH OR “FOOTBALL” HOLD

Clutch or “Football” Hold

  1. For the right breast, hold your baby level, facing up, at your right side.
  2. Put your baby’s head near your right nipple and support their back and legs under your right arm.
  3. Hold the base of your baby’s head with your right palm. A pillow underneath your right arm can help support your baby’s weight.
  4. To protect your back, avoid leaning down to your baby. Bring baby to you instead.
  5. Reverse for the left breast.

This hold is useful when:

  • You had a C-section
  • You have large breasts
  • You have flat or inverted nipples
  • You have a strong milk let-down
  • You are breastfeeding twins
  • Your baby likes to feed in an upright position
  • Your baby has reflux
  • You and your baby are comfortable in this position
CRADLE HOLD

Cradle Hold

  1. For the right breast, cradle your baby with your right arm. Your baby will be on their left side across your lap, facing you at nipple level.
  2. Your baby’s head will rest on your right forearm with your baby’s back along your inner arm and palm.
  3. Turn your baby’s tummy toward your tummy. Your left hand is free to support your breast, if needed. Pillows can help support your arm and elbow.
  4. To protect your back, avoid leaning down to your baby. Instead, bring your baby to you.
  5. Reverse for the left breast.

This hold is useful when:

  • Your baby needs help latching on
  • You and your baby are comfortable in this position
Laid-Back Hold

Laid-Back Hold

  1. Lean back on a pillow with your baby’s tummy touching yours and their head at breast level. Some moms find that sitting up nearly straight works well. Others prefer to lean back and lie almost flat.
  2. You can place your baby’s cheek near your breast, or you may want to use one hand to hold your breast near your baby. It’s up to you and what you think feels best.
  3. Your baby will naturally find your nipple, latch, and begin to suckle.

This hold is useful when:

  • Your baby is placed on your chest right after birth
  • You have a strong milk let-down
  • You have large breasts
  • You and your baby are comfortable in this position