

Skip to Content Skip to Footer
Wyoming WIC
Wyoming WIC
  • Home
  • Women
    • Women
      Breastfeeding
    • Women
      Healthy Tips for Moms
    • Women
      Postpartum
    • Women
      Pregnant
  • Infants
    • Infants
      Feeding & Nutrition
    • Infants
      Growth & Development
  • Children
    • Children
      Toddlers
    • Children
      2-5 Year Olds
  • Families
    • Families
      Activity and Play
    • Families
      Dads
    • Families
      Food & Family Meals
    • Families
      Immunizations
    • Families
      Safety
  • Content Suite
  • Food Shopping Guide
  • Español
Mother holding her newborn skin-to-skin in a hospital bed

Kid-Friendly Apple Cinnamon Oat Cups | WIC Recipe

  • Home
  • The Content Suite
  • Kid-Friendly Apple Cinnamon Oat Cups | WIC Recipe
WIC oat cups QR code
September 16, 2026 General /Family

apple cinnamon Apple Cinnamon Oat Cups: A Kid-Friendly Taste of Fall

September often brings busy mornings, new school routines, and the first hints of fall. It’s also a great time to enjoy apples! These apple cinnamon oat cups bring the cozy flavors of apple pie to a simple breakfast or snack that kids can hold in their hands.

The recipe is easy to make and gives children several ways to help in the kitchen. They can mash the banana, pour the ingredients, stir the mixture, or place paper liners in the muffin pan.

question parasite Why We Love Apples and Oats

Apples provide fiber and vitamin C. Fiber helps support healthy digestion, while vitamin C helps the body absorb iron and supports a healthy immune system. Leaving the peel on adds more fiber. Just be sure to dice the apple into very small pieces so it softens as the oat cups bake.

Oats are a whole grain that provides fiber and B vitamins. Fiber can help kids feel satisfied after eating, and B vitamins help the body use energy from food.

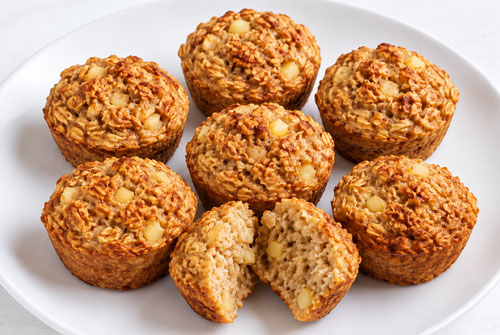
Plate of apple cinnamon oat muffins, one cut open
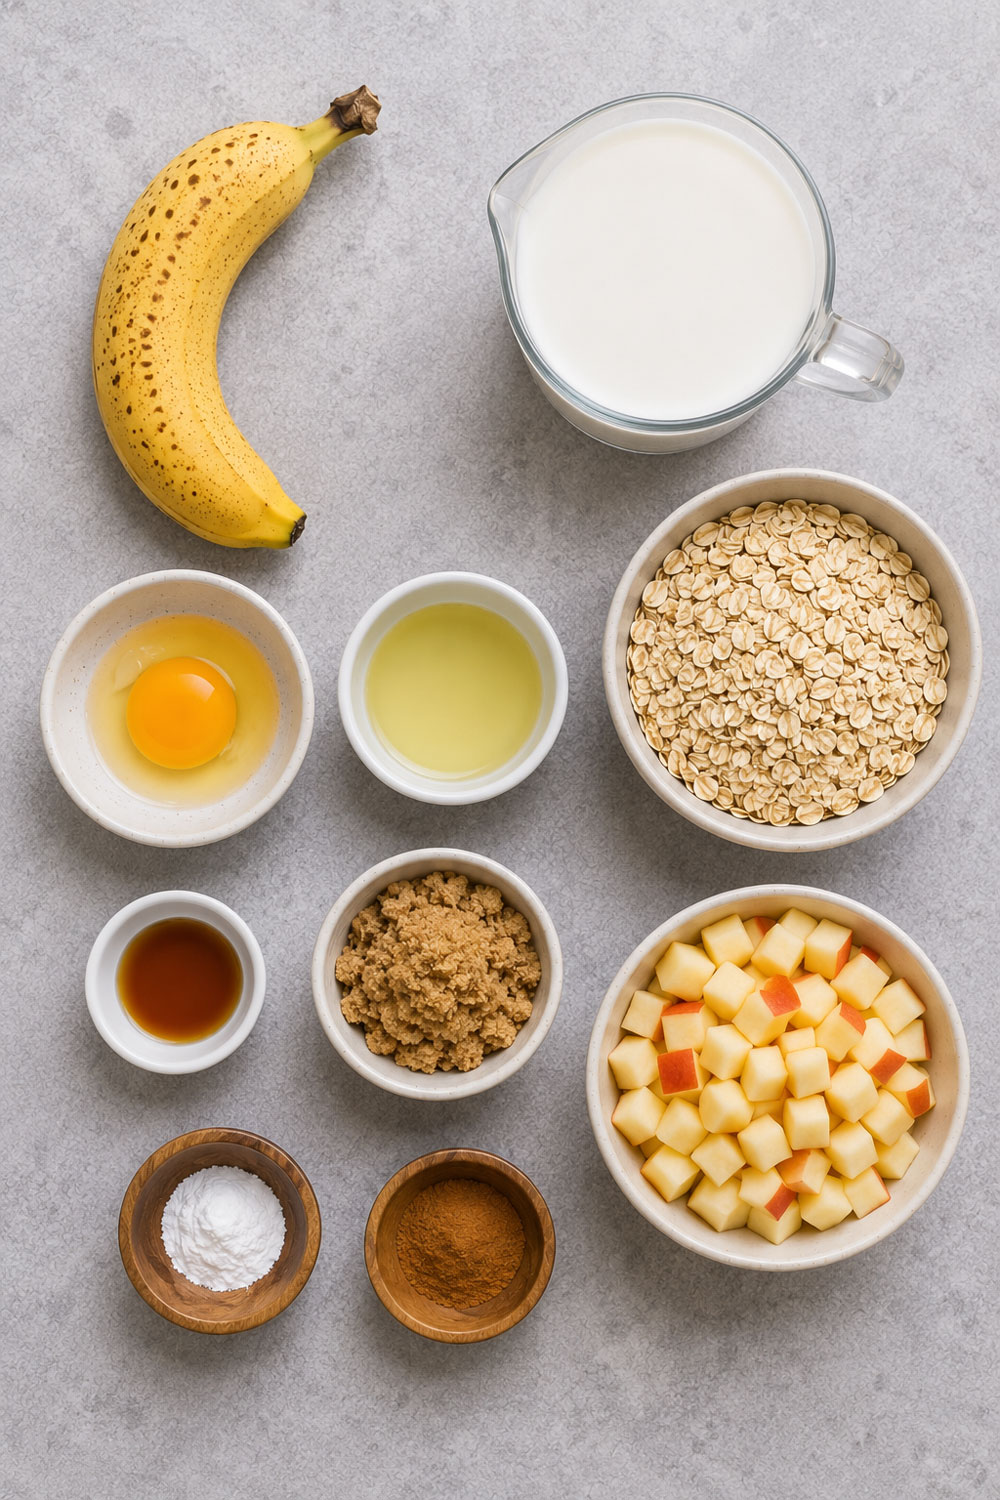
apple-cinnamon-oat-muffin-ingredients-on-counter

instruction icon Apple Cinnamon Oat Cups

Makes: 12 oat cups
Prep time: 10 minutes
Bake time: 22–25 minutes
Ingredients
  • 1 ripe banana
  • 1½ cups milk
  • 1 large egg
  • 2 tablespoons vegetable oil or melted butter
  • 1 teaspoon vanilla extract
  • 1–2 tablespoons brown sugar or maple syrup
  • 2 cups old-fashioned oats
  • 1 teaspoon baking powder
  • 1½ teaspoons ground cinnamon
  • 1 medium apple, cored and finely diced

notebook icon Directions

Hand greasing a muffin tray with cupcake liners
1.

Heat the oven to 350°F. Lightly grease a 12-cup muffin pan or add paper liners.
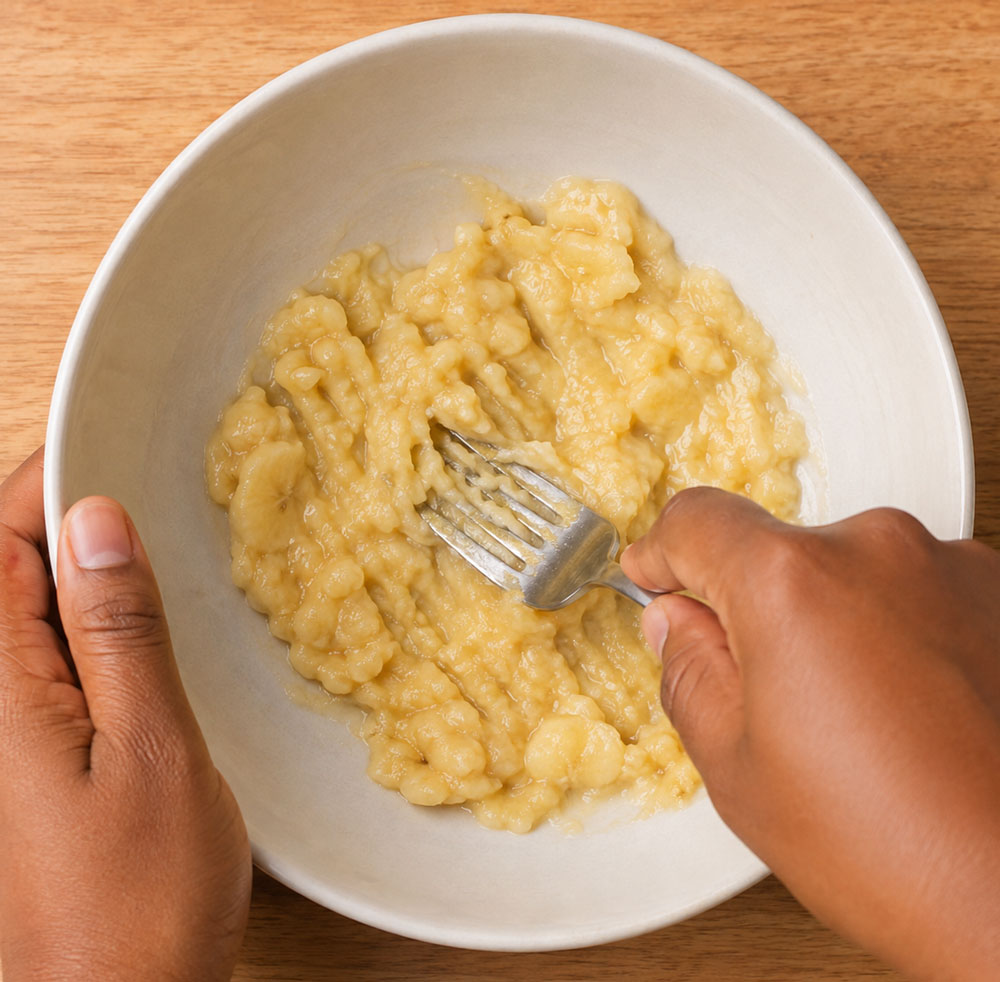
Hands mashing banana with fork in bowl
2.

Place the banana in a large bowl and mash it well with a fork.
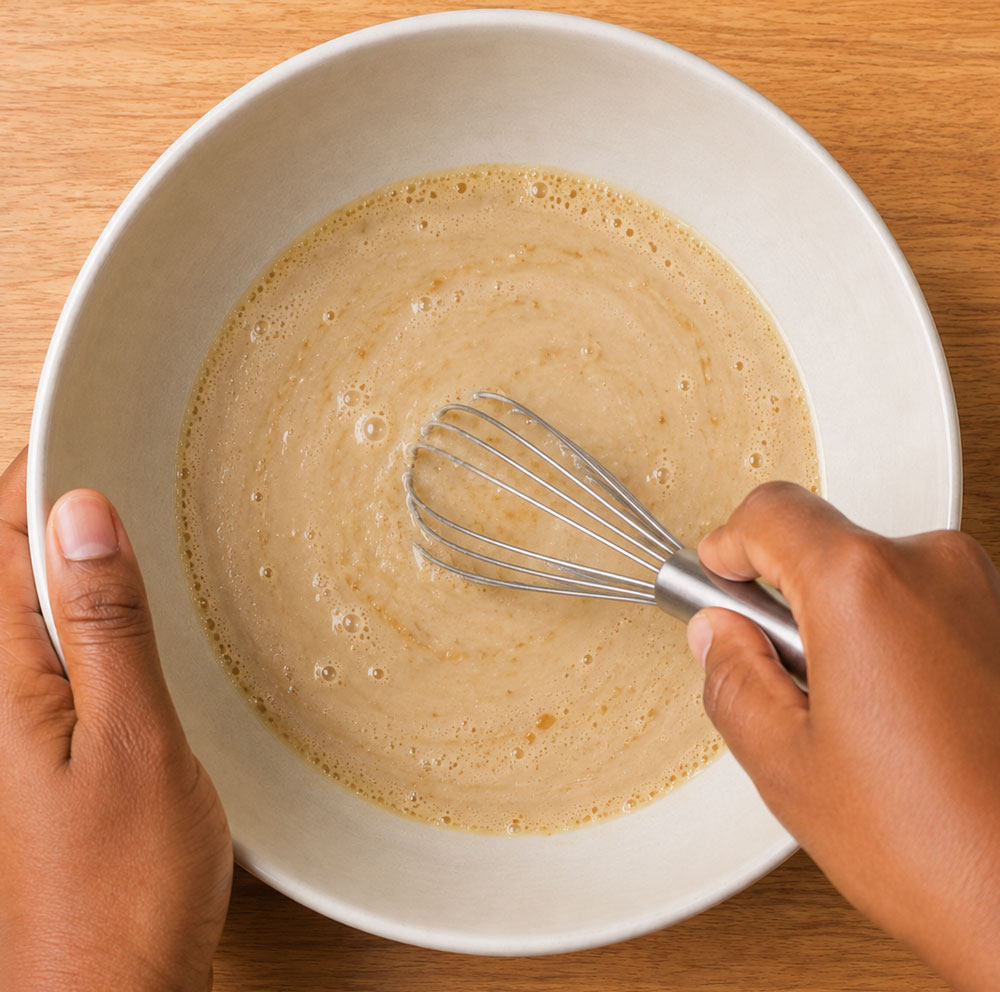
Hands whisking wet muffin batter in a bowl
3.

Add the milk, egg, oil or melted butter, vanilla, and brown sugar or maple syrup. Stir until combined.

Adding-oats-and-cinnamon-to-muffin-batter
4.

Add the oats, baking powder, and cinnamon. Stir again.
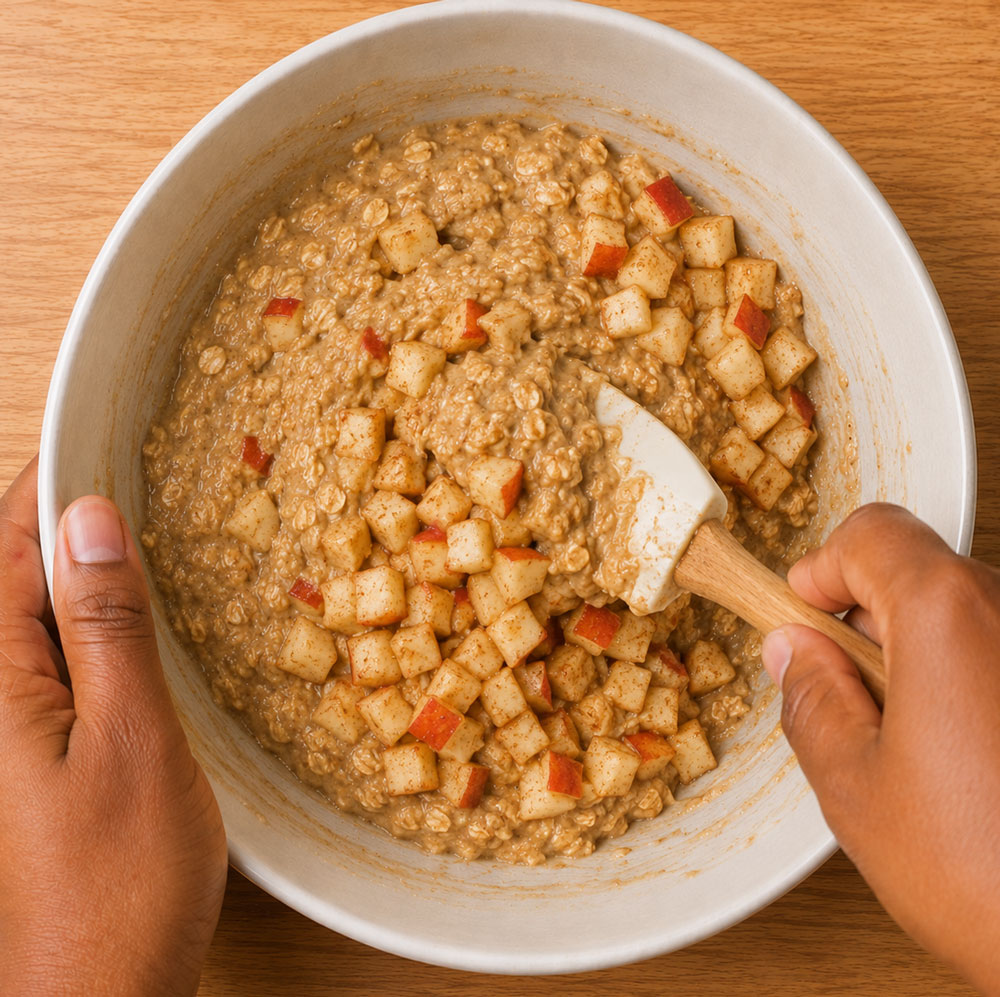
Folding-diced-apples-into-oat-muffin-batter
5.

Fold in the diced apple.

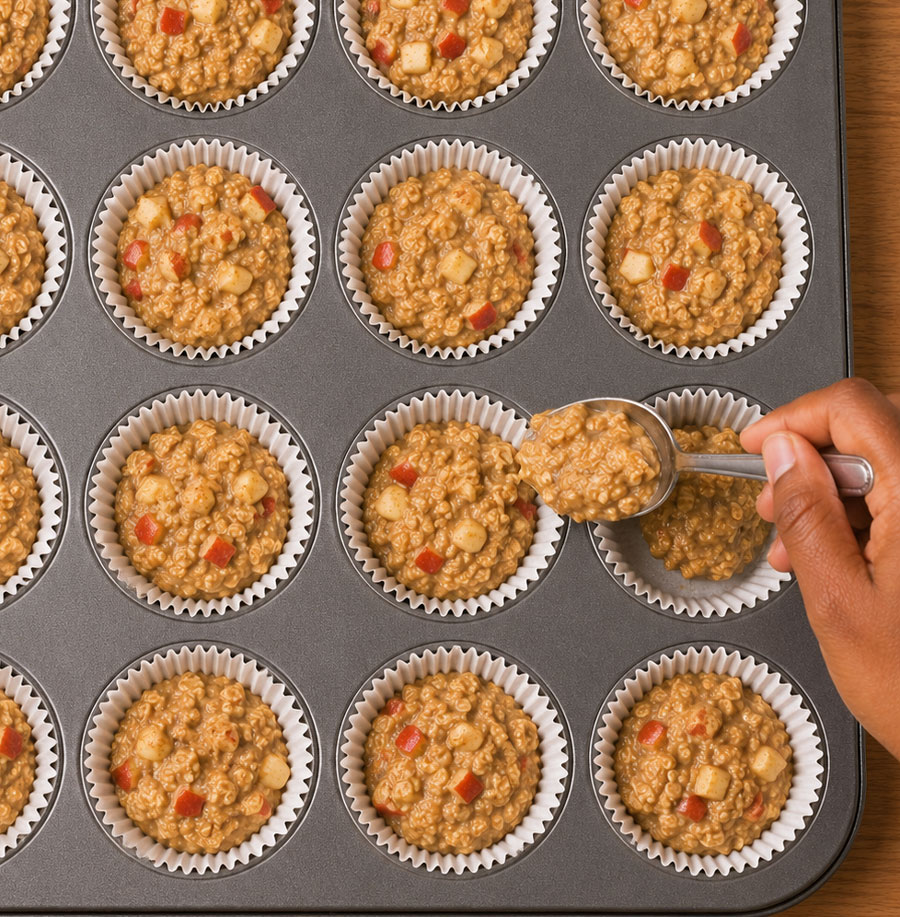
Spooning-oat-muffin-batter-into-muffin-tin
6.

Spoon the mixture evenly into the muffin cups. Stir the mixture between scoops so each cup gets some oats, liquid, and apple.

Placing-tray-of-apple-oat-muffins-into-oven
7.

Bake for 22–25 minutes, or until the centers are set and the tops are lightly golden.

Plate-of-baked-apple-cinnamon-oat-muffins
8.

Let the oat cups cool in the pan for 5–10 minutes before serving.

bottle drink Make Them Your Own

  • Serve an oat cup with a spoonful of WIC-approved yogurt.
  • Replace the apple with a ripe pear for a different fall flavor.
  • Freeze individual oat cups for an easy breakfast on a busy morning.

Place leftovers in the refrigerator within two hours. Store them in a covered container for up to four days, or freeze them for later and enjoy within 3 months.

For young children, make sure the apple pieces are very small and soft after baking. Cut the oat cup into pieces that match your child’s eating skills and always supervise them while they eat.
Saftey Tip
mother-spooning-batter-into-muffin-tin-with-toddler

REFERENCES:

National Institute of Health. (March 21, 2022). Vitamin C.
https://ods.od.nih.gov/factsheets/VitaminC-Consumer/

United States Department of Agriculture. (August 2026). FoodData Central.
https://fdc.nal.usda.gov/

United States Department of Agriculture. (July 31, 2020). Leftovers and Food Safety.
https://www.fsis.usda.gov/food-safety/safe-food-handling-and-preparation/food-safety-basics/leftovers-and-food-safety

Do you find this Blog helpful?

Show some love here!

SMS Communication Consent

No comments yet. Be the first to share your thoughts!

Scroll To Top

You May Also Like...

September 2, 2026

Protecting Your Family from Cyclospora: Summer Food & Water Safety

How to Protect Your Family from Cyclospora Food safety is always a hot topic in the summer; rising temperatures means more bacteria growth when food isn’t handled properly. And when…

Read More
4
0
July 22, 2026

The Benefits of Family Meals for Kids and Parents

The Benefits of Eating Meals Together as a Family Think about your family meals for a moment. How often does your family sit down and eat together? Is the TV…

Read More
4
0
May 20, 2026

Meet the Milks: Dairy and Plant-Based Choices

Meet the Milks Thirty years ago, for many of us, milk meant whole milk, 2%, 1%, or skim. And it just came from cows. Today, milk can mean so much…

Read More
3
0
WATCH VIDEOS
  • Infant
    • Infant Pacifiers: Benefits, Safety Tips, and When to Wean
    • When to Start Peanut and Egg to Help Prevent Allergies
    • The Basics of Paced Bottle-Feeding
    • How Do I Know If My Baby Could Be Tongue-Tied?
    • Protect Your Baby from Cronobacter
  • Children
    • Food, Feelings, and Your Child’s Health | How Nutrition Affects Mood
    • Simple Child Safety Tips Every Parent Should Know
    • Shopping With Kids: A Simple Way to Help Them Like More Foods
    • Pumpkin Fun: Free and Healthy Activities for Kids Under 5
    • Letting Your Child Play with Food Can Be a Good Thing
  • General /Family
    • Protecting Your Family from Cyclospora: Summer Food & Water Safety
    • The Benefits of Family Meals for Kids and Parents
    • Meet the Milks: Dairy and Plant-Based Choices
    • Avoiding Food Waste
    • The 2025-2030 Dietary Guidelines for Americans – What Families Need to Know
  • Women
    • Breastfeeding Nipple Pain: What’s Normal and When to Get Help
    • Cluster Feeding Explained | WIC Breastfeeding Support
    • Breastfeeding Support Available Through WIC | Pumps, Peer Counselors & More
    • How Partners Can Support Breastfeeding
    • Common Breastfeeding Challenges and Simple Solutions for Parents
  • Recipes
    • Rainbow Fruit Salsa with Cinnamon Chips | Healthy Family Snack Recipe
    • Healthy Red, White, and Blue Snacks for Kids
    • Simple Meals with Canned Fish: Easy, Healthy & Budget-Friendly Ideas
    • Fresh & Easy Spring Snacks for Toddlers
    • Fresh & Easy Spring Veggie Pasta
Wyoming WIC WDH Public Health

CONTACT US

1-888-996-9378
health.wyo.gov/wic
  • How to apply for WIC

Resources

  • WIC Shopper
  • WIC Smart
  • WIC Breastfeeding Support
  • Wyoming Medicaid
  • Wyoming 211
  • Tell a friend about WIC!
  • Guide to Using Your WIC Benefits
  • Wyoming WIC Facebook
  • Wyoming WIC Instagram
  • Wyoming WIC

USDA is an equal opportunity provider, employer, and lender.

Cookie PolicyPrivacy Policy

© Brush Art Corporation
This website is operated by Brush Art Corporation on behalf of the Wyoming Department of Health.

Install this web app on your iPhone: tap and then Add to Home Screen.
Share to Social

Share this link via

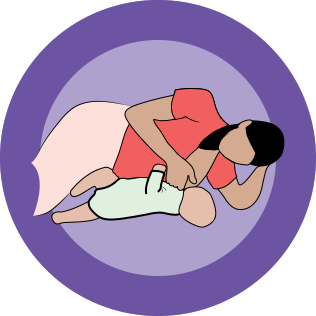
SIDE-LYING HOLD

Side-Lying Hold

  1. For the right breast, lie on your right side with your baby facing you.
  2. Pull your baby close. Your baby’s mouth should be level with your nipple.
  3. In this position, you can cradle your baby’s back with your left arm and support yourself with your right arm and/or pillows.
  4. Keep loose clothing and bedding away from your baby.
  5. Reverse for the left breast.

This hold is useful when:

  • You had a C-section
  • You want to rest while baby feeds
  • You are breastfeeding in the middle of the night
  • You and your baby are comfortable in this position
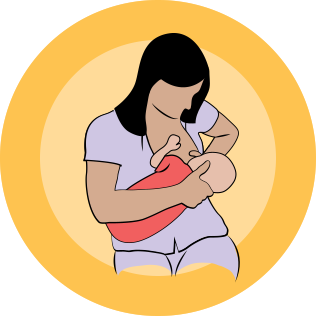
CROSS-CRADLE HOLD

Cross-Cradle Hold

  1. For the right breast, use your left arm to hold your baby’s head at your right breast and baby’s body toward your left side. A pillow across your lap can help support your left arm.
  2. Gently place your left hand behind your baby’s ears and neck, with your thumb and index finger behind each ear and your palm between baby’s shoulder blades. Turn your baby’s body toward yours so your tummies are touching.
  3. Hold your breast as if you are squeezing a sandwich. To protect your back, avoid leaning down to your baby. Instead, bring your baby to you.
  4. As your baby’s mouth opens, push gently with your left palm on baby’s head to help them latch on. Make sure you keep your fingers out of the way.
  5. Reverse for the left breast.

This hold is useful when:

  • Your baby is premature
  • Your baby has a weak suck
  • Your baby needs help to stay latched
  • Your baby needs extra head support
  • You and your baby are comfortable in this position
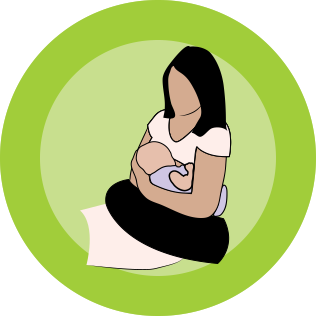
CLUTCH OR “FOOTBALL” HOLD

Clutch or “Football” Hold

  1. For the right breast, hold your baby level, facing up, at your right side.
  2. Put your baby’s head near your right nipple and support their back and legs under your right arm.
  3. Hold the base of your baby’s head with your right palm. A pillow underneath your right arm can help support your baby’s weight.
  4. To protect your back, avoid leaning down to your baby. Bring baby to you instead.
  5. Reverse for the left breast.

This hold is useful when:

  • You had a C-section
  • You have large breasts
  • You have flat or inverted nipples
  • You have a strong milk let-down
  • You are breastfeeding twins
  • Your baby likes to feed in an upright position
  • Your baby has reflux
  • You and your baby are comfortable in this position
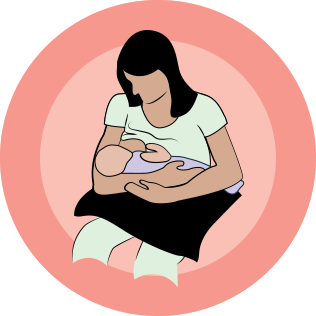
CRADLE HOLD

Cradle Hold

  1. For the right breast, cradle your baby with your right arm. Your baby will be on their left side across your lap, facing you at nipple level.
  2. Your baby’s head will rest on your right forearm with your baby’s back along your inner arm and palm.
  3. Turn your baby’s tummy toward your tummy. Your left hand is free to support your breast, if needed. Pillows can help support your arm and elbow.
  4. To protect your back, avoid leaning down to your baby. Instead, bring your baby to you.
  5. Reverse for the left breast.

This hold is useful when:

  • Your baby needs help latching on
  • You and your baby are comfortable in this position
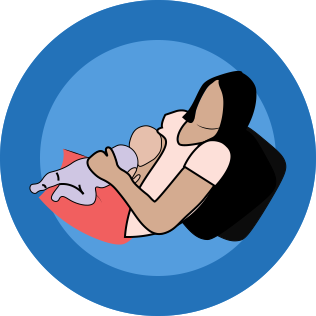
Laid-Back Hold

Laid-Back Hold

  1. Lean back on a pillow with your baby’s tummy touching yours and their head at breast level. Some moms find that sitting up nearly straight works well. Others prefer to lean back and lie almost flat.
  2. You can place your baby’s cheek near your breast, or you may want to use one hand to hold your breast near your baby. It’s up to you and what you think feels best.
  3. Your baby will naturally find your nipple, latch, and begin to suckle.

This hold is useful when:

  • Your baby is placed on your chest right after birth
  • You have a strong milk let-down
  • You have large breasts
  • You and your baby are comfortable in this position