Skip to Content Skip to Footer
Wyoming WIC
Wyoming WIC
  • Home
  • Women
    • Women
      Breastfeeding
    • Women
      Healthy Tips for Moms
    • Women
      Postpartum
    • Women
      Pregnant
  • Infants
    • Infants
      Feeding & Nutrition
    • Infants
      Growth & Development
  • Children
    • Children
      Toddlers
    • Children
      2-5 Year Olds
  • Families
    • Families
      Activity and Play
    • Families
      Dads
    • Families
      Food & Family Meals
    • Families
      Immunizations
    • Families
      Safety
  • Live Well Blog
  • Food Shopping Guide
  • Español
Gardening Banner

Gardening

  • Home
  • Live Well Blog
  • Gardening
Gardening-QR-code
January 24, 2024 General /Family

Gardening: A World of Fun Learning About Food!

Bridget Swinney MS, RDN, LD

Looking for an activity that’s kid-friendly, educational, and builds self-confidence? Look into gardening!

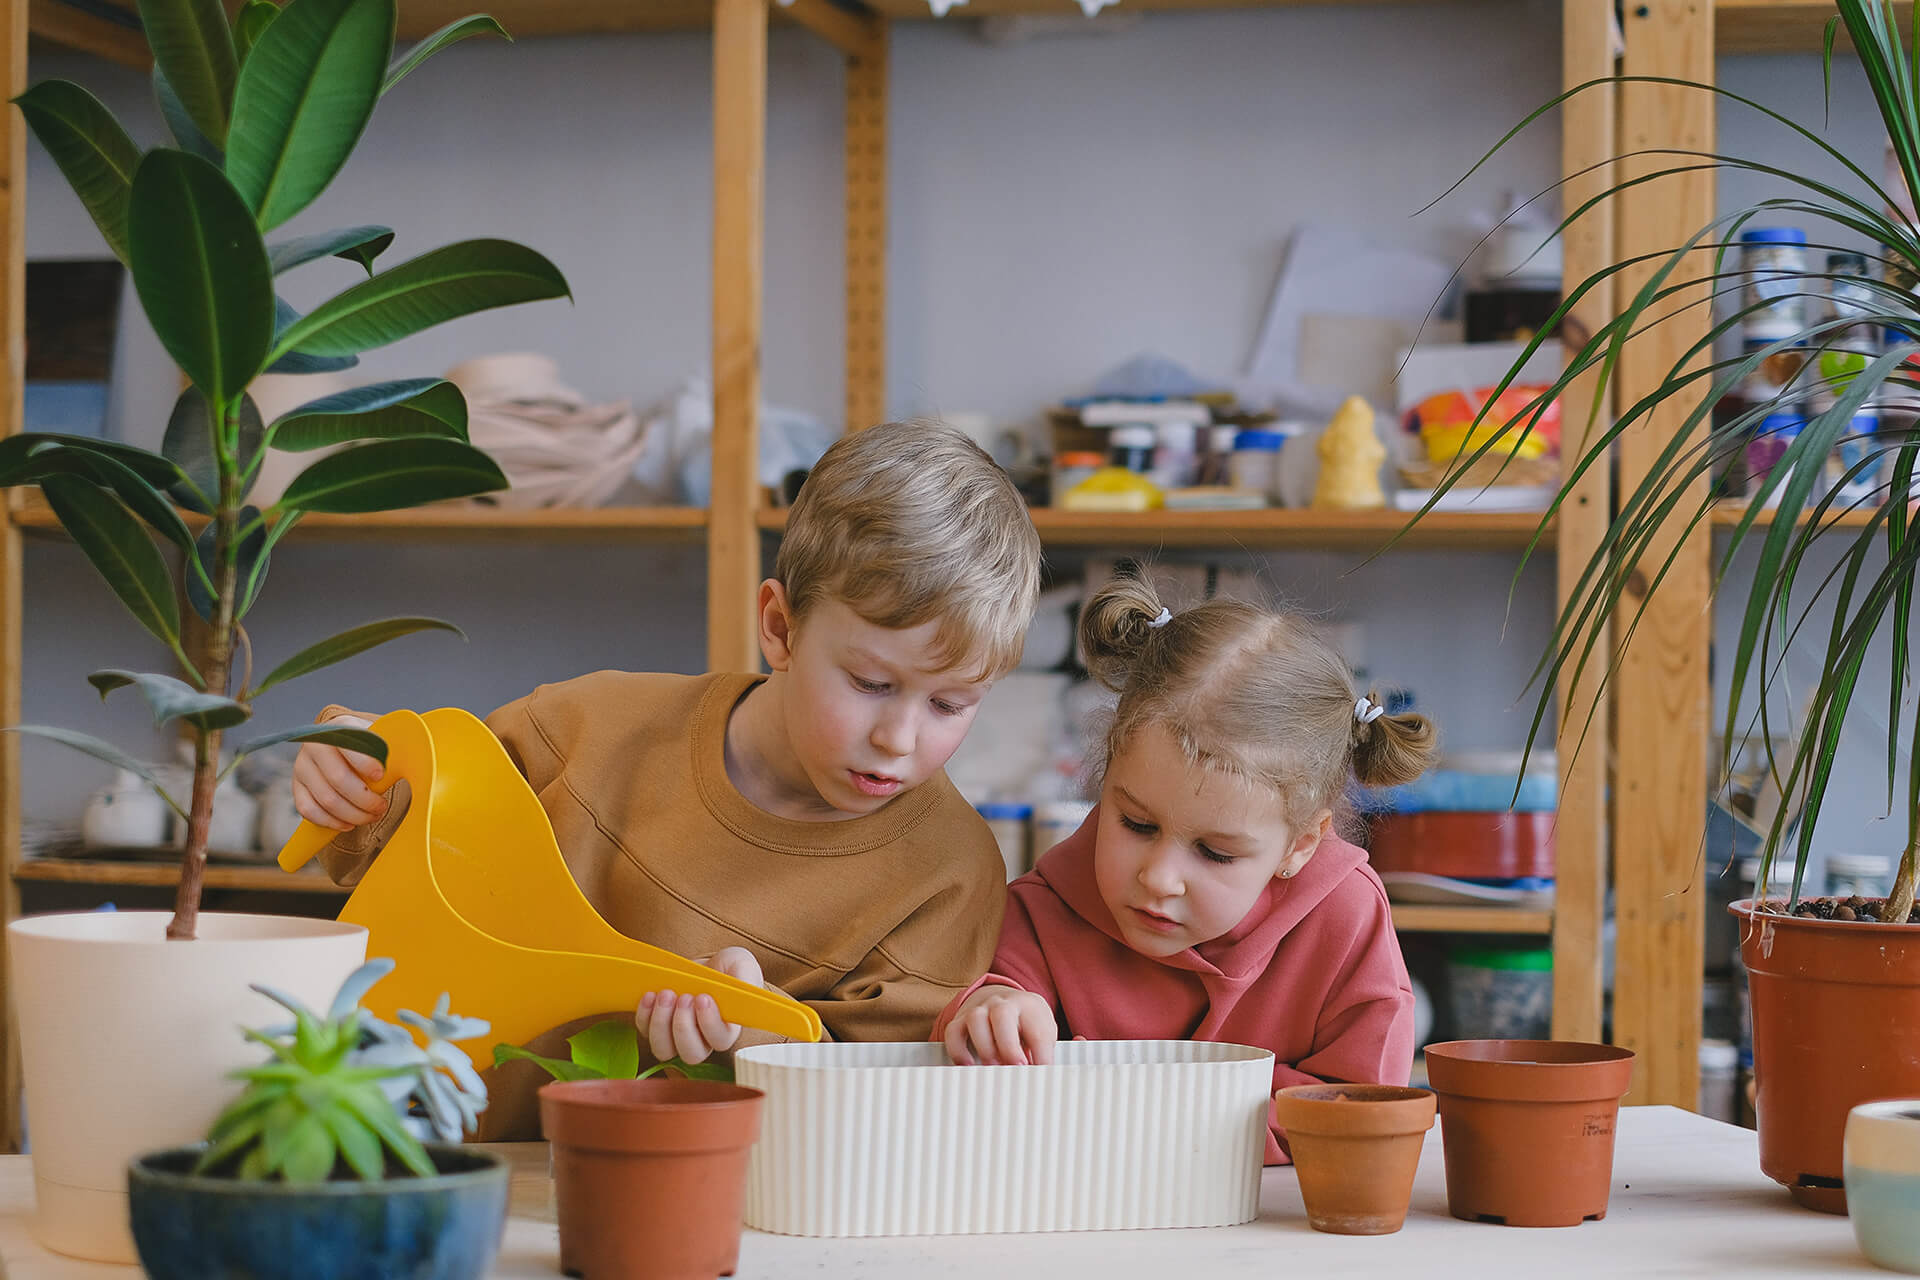
Most of us remember planting a bean in a paper cup in elementary school and the excitement of watching it grow. You can offer your children the same joy and teach them where food comes from by starting your own garden. It may even get them interested in eating and cooking veggies! Now, that’s a WIN! Don’t worry if you don’t have a yard or a lot of space—container gardening on your porch or patio works too.

Did you know?

Gardening can help your child learn math, science and nature skills. It’s also a healthy habit because spending time outside reduces heart rate and muscle tension, and sunshine increases vitamin D levels. Gardening may even help your immune system!

Get Ready

  • Consider where you will start your garden and what kind of garden you want. Besides veggies, you can also plant herbs or flowers. You can even grow a “salsa garden”. Chiles and tomatoes grow great in the summer, even in a container. Any space will work as long as it gets some sun.
  • Find your “plant hardiness zone”, which helps you know which plants will grow best in your area. Go to the USDA website here and type in your zip code to find your zone.
  • Look at your space and determine how many hours of sun your garden area or patio gets and match it to a plant with the same sunshine needs.
  • Consider native plants, which are adapted to your local climate and soil. Some flowering native plants attract hummingbirds, while others attract butterflies, which are a joy to watch. Native plants don’t require fertilizer and need less water. Find free garden plans, and native plant lists here.
  • Find an expert to talk about what grows best in your area. This can be someone at a local nursery or home improvement store, or your town’s County Extension Office. Find your county extension office here.

TIP!

Get even more from your WIC fruit and veggie benefits! Save seeds from tomatoes, peppers, beans, and peas, and use them to start your own garden.

Get Set

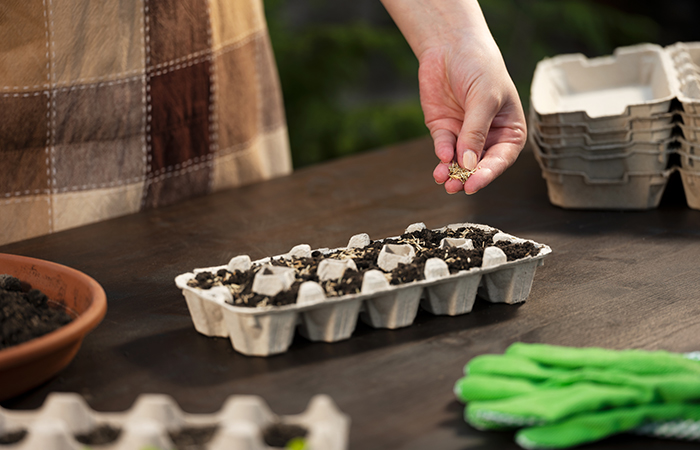
  • The cheapest and often best way to start a garden is to begin with seeds. If you want to start before spring (or winter), you can use cardboard egg containers to plant your seeds indoors. Once they sprout, you can actually cut apart the sections and put the whole cardboard section into the ground!
  • Involve your kids in the planning by looking at books on gardening from the library or at photos online. (Find a list of gardening books for kids here.) It’s fun to go to a nursery to look at plants and smell the different herbs before choosing which to plant.
  • You don’t need fancy pots—you can start plants in discarded yogurt containers or even plastic storage bins. Just punch holes in the bottom for water to drain.
Garden Grow
Garden Grow

Go Garden!

  • Let your child dig in the dirt to get used to working with the soil. Find small, easy-to-handle tools for your child to use—old baby spoons and forks may work for tiny hands.
  • Seed packages will note how deep to plant a seed. Mark wooden craft sticks with inch marks to help plant seeds at the right level.
  • Write down a watering and weeding schedule for you and your child. Some flowers need to have the dead blooms removed so others can grow. A schedule teaches your child responsibility and is a good reminder to water, especially when the seeds haven’t germinated yet.
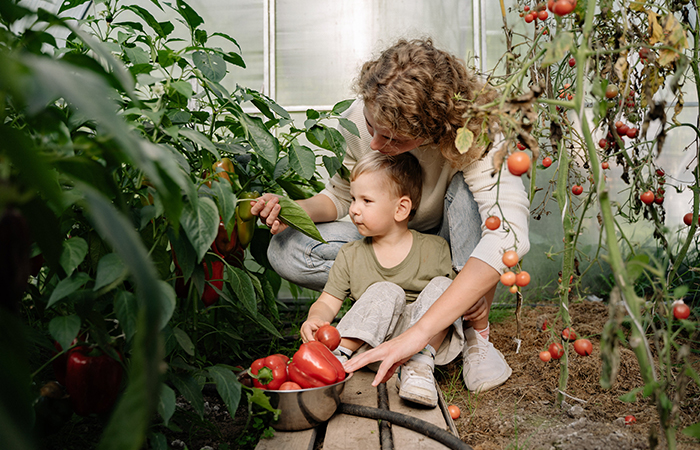
  • Learn about and teach your child the best time to pick a tomato, or the way to snip a flower or herb, etc. Talk about how you will use what you harvest—eat the cherry tomato off the vine or slice it on a sandwich? Put the flower in a vase or give it to Grandma?
  • Avoid using chemicals in your garden; they aren’t needed and can be dangerous around children.
  • At the end of the growing season, let flowers go to seed, and collect the seeds to plant next year. Consider repotting herb plants in a pot to keep indoors in the winter.
  • Infant
    • The Basics of Paced Bottle-Feeding
    • How Do I Know If My Baby Could Be Tongue-Tied?
    • Protect Your Baby from Cronobacter
    • Exploring the World with Baby – Sensory Play
    • Get Your Baby “Back” to Sleep in a Safe Environment
  • Children
    • Shopping With Kids: A Simple Way to Help Them Like More Foods
    • Pumpkin Fun: Free and Healthy Activities for Kids Under 5
    • Letting Your Child Play with Food Can Be a Good Thing
    • Is Snack Time Treat Time?
    • Fun Ways to Learn About Healthy Food and Get Moving!
  • General /Family
    • Finding Calm When Life Gets Busy: Stress-Management for Parents
    • February Is National Heart Month: Simple Ways to Show Your Heart Some Love
    • 10 Ways to Enjoy Avocados – And Helpful Tips to Feed with Confidence
    • Food, Feelings, and Finding Balance: Understanding Disordered Eating
    • Liquid Calories – Time to Rethink Your Drink?
  • Women
    • How to Know Your Baby Is Getting Enough Breastmilk
    • Breastfeeding Through Growth Spurts and Sleep Changes
    • Baby Blues… or Is It Something More?
    • Gut Health and Gestational Diabetes
    • Blood Pressure: Do You Know Your Numbers?
  • Recipes
    • Heart-Healthy Recipe: Banana Berry Oatmeal Cups
    • Is the Chia Seed Challenge Worth It?
    • Extra Vegetables Quiche
    • Easy Pumpkin Muffins
    • Confetti Bean Salad
Wyoming WIC WDH Public Health

CONTACT US

1-888-996-9378
health.wyo.gov/wic
  • How to apply for WIC

Resources

  • WIC Shopper
  • WIC Smart
  • WIC Breastfeeding Support
  • Wyoming Medicaid
  • Wyoming 211
  • Tell a friend about WIC!
  • Guide to Using Your WIC Benefits
  • Wyoming WIC Facebook
  • Wyoming WIC Instagram
  • Wyoming WIC

USDA is an equal opportunity provider, employer, and lender.

Cookie PolicyPrivacy Policy

© Brush Art Corporation
This website is operated by Brush Art Corporation on behalf of the Wyoming Department of Health.

Install this web app on your iPhone: tap and then Add to Home Screen.

SIDE-LYING HOLD

Side-Lying Hold

  1. For the right breast, lie on your right side with your baby facing you.
  2. Pull your baby close. Your baby’s mouth should be level with your nipple.
  3. In this position, you can cradle your baby’s back with your left arm and support yourself with your right arm and/or pillows.
  4. Keep loose clothing and bedding away from your baby.
  5. Reverse for the left breast.

This hold is useful when:

  • You had a C-section
  • You want to rest while baby feeds
  • You are breastfeeding in the middle of the night
  • You and your baby are comfortable in this position
CROSS-CRADLE HOLD

Cross-Cradle Hold

  1. For the right breast, use your left arm to hold your baby’s head at your right breast and baby’s body toward your left side. A pillow across your lap can help support your left arm.
  2. Gently place your left hand behind your baby’s ears and neck, with your thumb and index finger behind each ear and your palm between baby’s shoulder blades. Turn your baby’s body toward yours so your tummies are touching.
  3. Hold your breast as if you are squeezing a sandwich. To protect your back, avoid leaning down to your baby. Instead, bring your baby to you.
  4. As your baby’s mouth opens, push gently with your left palm on baby’s head to help them latch on. Make sure you keep your fingers out of the way.
  5. Reverse for the left breast.

This hold is useful when:

  • Your baby is premature
  • Your baby has a weak suck
  • Your baby needs help to stay latched
  • Your baby needs extra head support
  • You and your baby are comfortable in this position
CLUTCH OR “FOOTBALL” HOLD

Clutch or “Football” Hold

  1. For the right breast, hold your baby level, facing up, at your right side.
  2. Put your baby’s head near your right nipple and support their back and legs under your right arm.
  3. Hold the base of your baby’s head with your right palm. A pillow underneath your right arm can help support your baby’s weight.
  4. To protect your back, avoid leaning down to your baby. Bring baby to you instead.
  5. Reverse for the left breast.

This hold is useful when:

  • You had a C-section
  • You have large breasts
  • You have flat or inverted nipples
  • You have a strong milk let-down
  • You are breastfeeding twins
  • Your baby likes to feed in an upright position
  • Your baby has reflux
  • You and your baby are comfortable in this position
CRADLE HOLD

Cradle Hold

  1. For the right breast, cradle your baby with your right arm. Your baby will be on their left side across your lap, facing you at nipple level.
  2. Your baby’s head will rest on your right forearm with your baby’s back along your inner arm and palm.
  3. Turn your baby’s tummy toward your tummy. Your left hand is free to support your breast, if needed. Pillows can help support your arm and elbow.
  4. To protect your back, avoid leaning down to your baby. Instead, bring your baby to you.
  5. Reverse for the left breast.

This hold is useful when:

  • Your baby needs help latching on
  • You and your baby are comfortable in this position
Laid-Back Hold

Laid-Back Hold

  1. Lean back on a pillow with your baby’s tummy touching yours and their head at breast level. Some moms find that sitting up nearly straight works well. Others prefer to lean back and lie almost flat.
  2. You can place your baby’s cheek near your breast, or you may want to use one hand to hold your breast near your baby. It’s up to you and what you think feels best.
  3. Your baby will naturally find your nipple, latch, and begin to suckle.

This hold is useful when:

  • Your baby is placed on your chest right after birth
  • You have a strong milk let-down
  • You have large breasts
  • You and your baby are comfortable in this position